本文已由@unisauce 翻译完成,译文地址:http://www.howzhi.com/group/photoshop/discuss/16458
by Thiago Storino via tutsplus
In this tutorial, we will not only show how to create the effect in Photoshop, but we will also show how to light and shoot the photography, as well. In this part, we will explain how to extract the model from the background, remove his tattoos, as well as how to pull away his skin, and insert some mechanical objects underneath. Let's get started!
Before you begin, see this tutorial from Rob Taylor that explains how the key photos for this tutorial were taken.
To complete this tutorial, you will need the following assets. Please download them before you begin. If they are not available, or if you do not wish to purchase them, you will need to find alternatives.
Open _MG_6590.DNG and with Pen Tool (P), separate the model from the background. Create a path around the model, press Command/Ctrl-Enter to make a selection and then use Feather (Shift-F6) around 0.5 to make the selection softer.

In the next few steps we will need to retouch the model just a bit. Create a new layer, and with the Clone Stamp Tool (S) remove the imperfections and tattoos from the skin, as well as the objects that the model is holding.

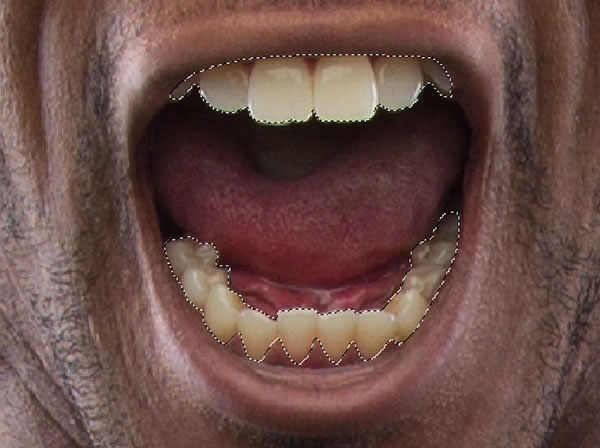
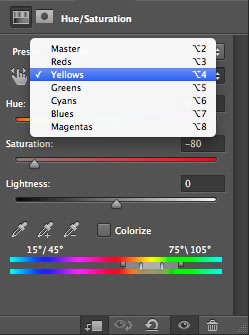
Now, with the Pen Tool (P), create a selection of the teeth and use Hue/Saturation to decrease the yellow tone of the model's teeth. Select Yellows and set the Saturationto -80.
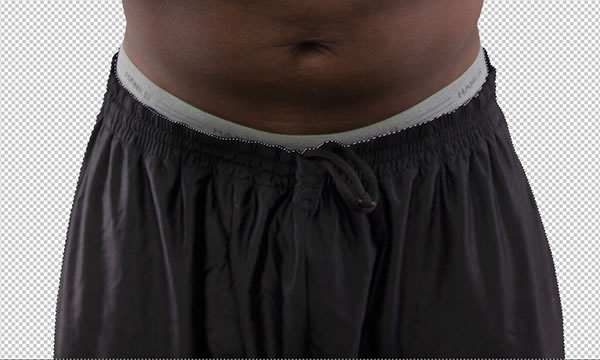
To accentuate the lighting on the shorts, make a selection, and with the Curvesadjustment, increase the highlights.
Then, mask following the direction of light.

To reduce the eye's shadow, use the Curves adjustment again, and mask the area between the eyes and nose.
Then, mask following the direction of light.
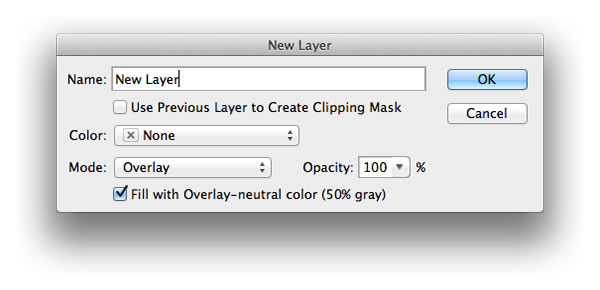
Now use the Dodge and Burn tools to accentuate the highlights and shadows. First, press Alt key and click on the Create a new layer icon at the bottom of the Layerspanel.

In the dialogue box that opens, change the Mode to Overlay and mark the Fill with Overlay-neutral color 50% gray option at the bottom.
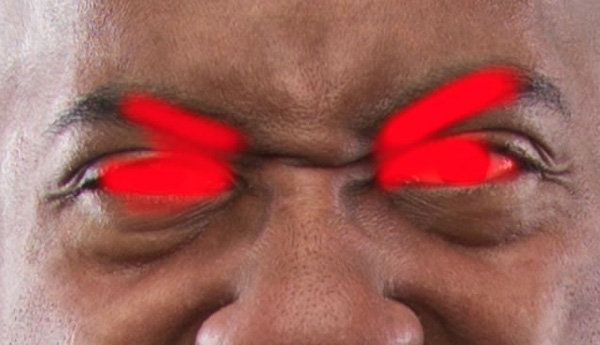
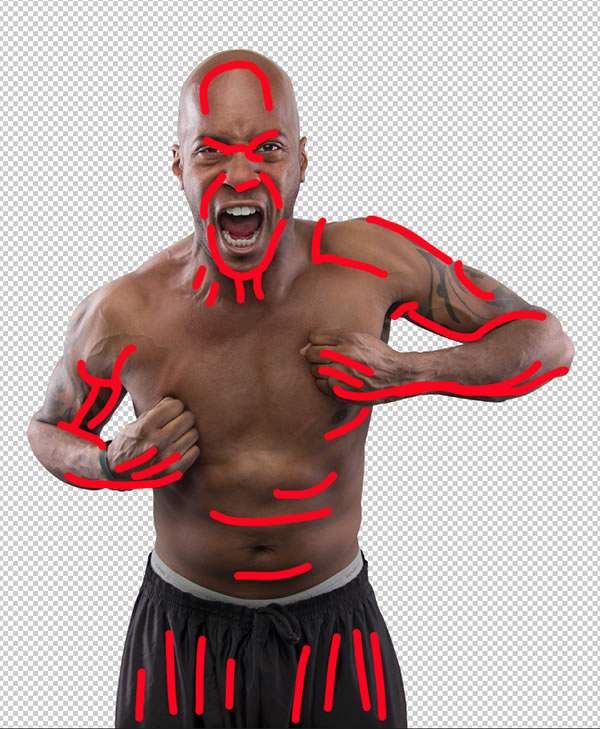
Then, with the Dodge tool, paint as shown below.

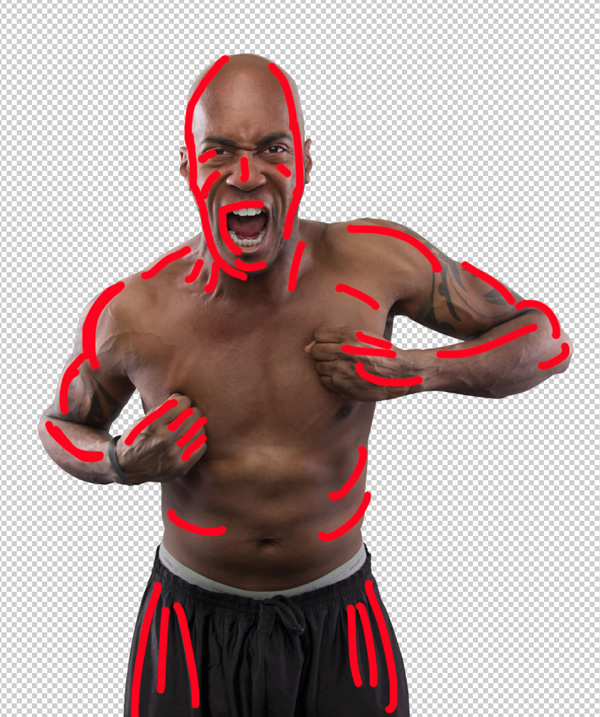
After that, use the Burn tool, to accentuate the shadows using the settings below.

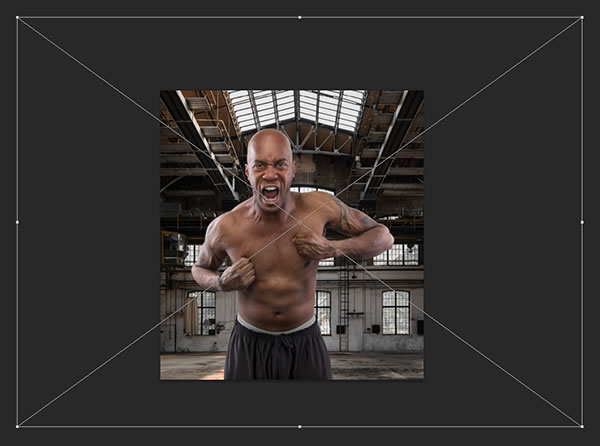
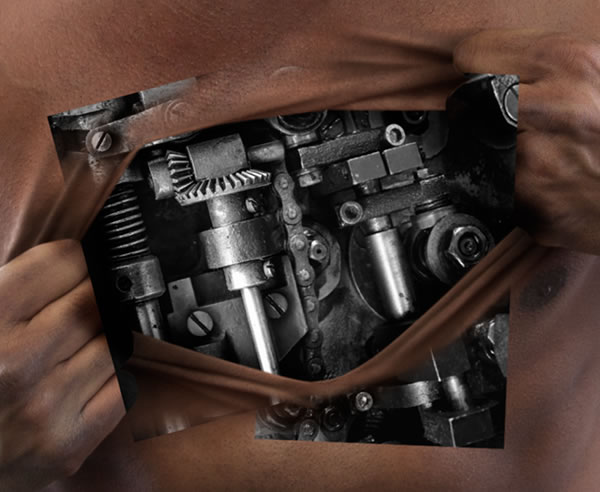
Open the old factory image and position it behind the model.
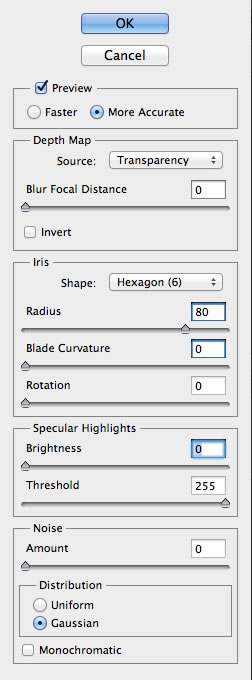
To isolate the model, you will need to blur the background with the Lens Blur filter, (Filter > Blur > Lens Blur) using the settings shown below.
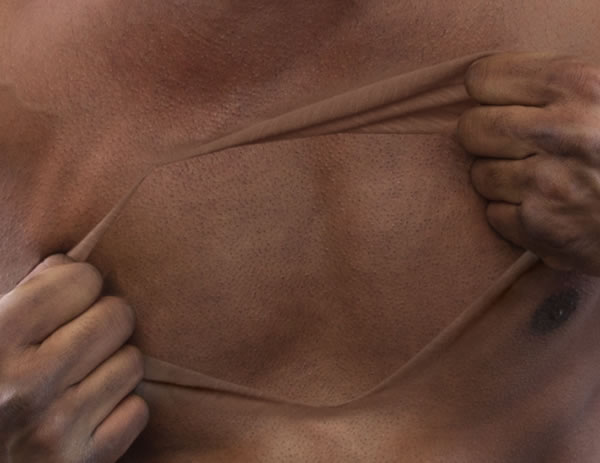
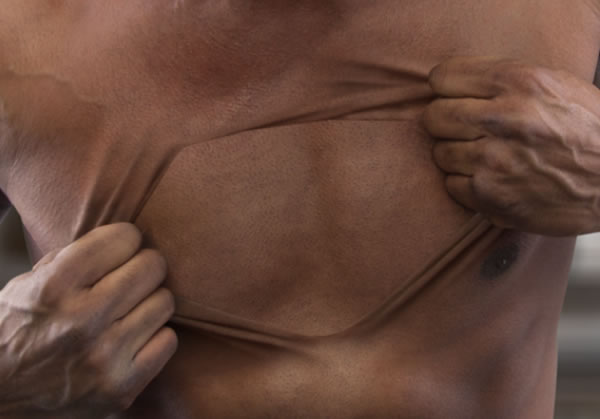
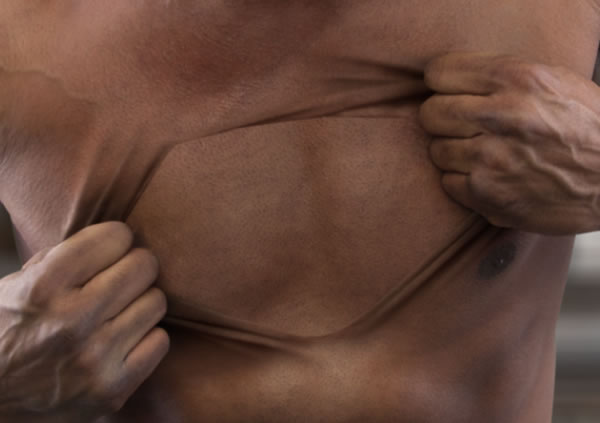
Open _MG_6598.DNG, rotate and position the ripped shirt like below.
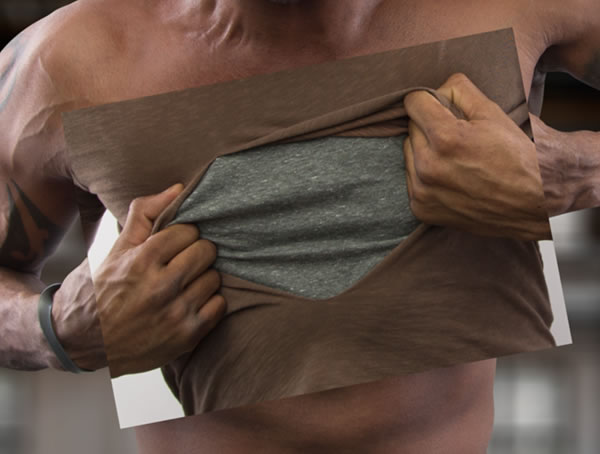
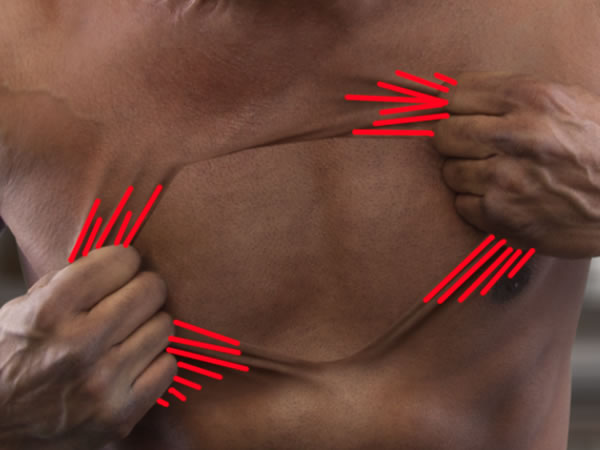
Then, with a soft brush, mask to show only the rips and folds. Make sure not to mask over the hands. Make a path around the fingers leaving the thumb out, you will not use it.
Now, you'll adjust color and contrast. First, make a merged copy of the model, duplicate all his layers and merge with Command/Ctrl-E, then link to the rip layer and set theBlend Mode to Color and Opacity to 75%.
After that, create a Gradient Map layer and set like below.
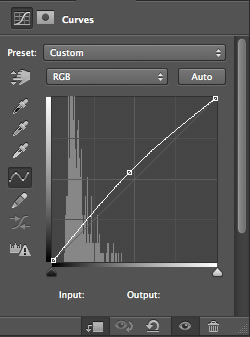
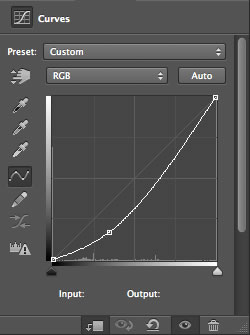
Now, adjust the contrast with Curves.

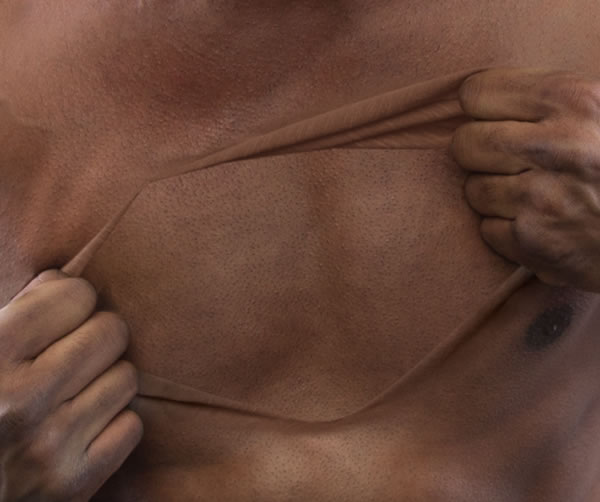
The next step will be adding more folds on the chest. Open _MG_6595.DNG and cut out some of the folds.
Then, with a soft brush, mask some parts to better integrate.

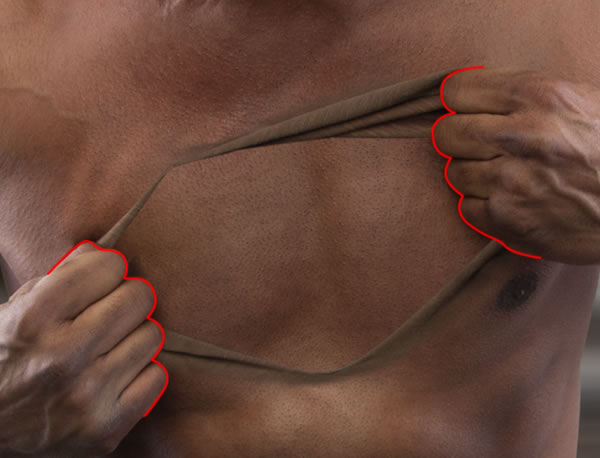
After that, use the same techniques used before on the ripped clothing. Once again, duplicate the model's layers and with a soft brush, mask it to reveal the skin texture where the shirt texture is very evident.
Using Curves, create the shadow of the hands on his chest.
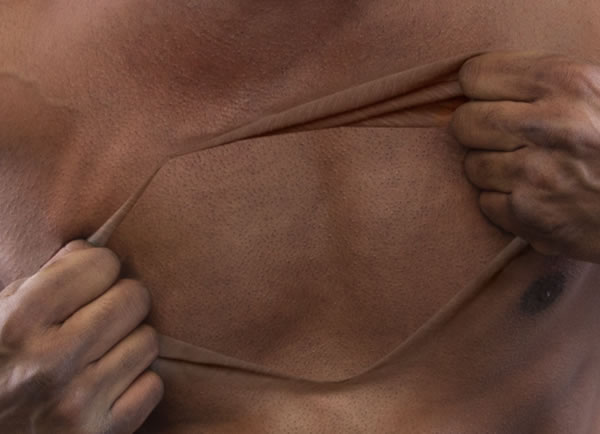
To finalize this part, use Dodge and Burn, as was done previously.

Open the machine image, and with Hue/Saturation, totally remove the color, then rotate and position like below.
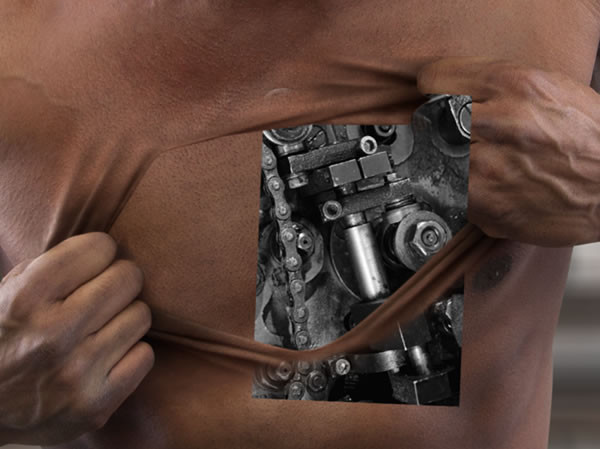
Then, position the gear image and desaturate it, as well.

To equalize the contrast, use Curves as shown in the following image.

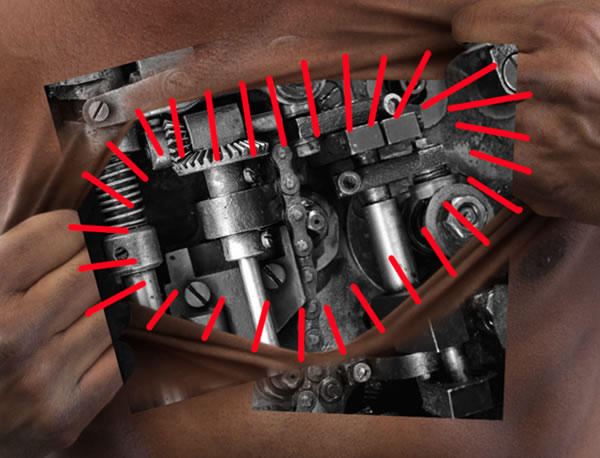
With a soft brush, mask to unify the images.

Using Curves, mask to create the shadow between the skin and mechanical parts.
Now, add some wires on the chest, you can place them as you wish. Open the wires image and with Pen Tool, cut out some wires pieces.
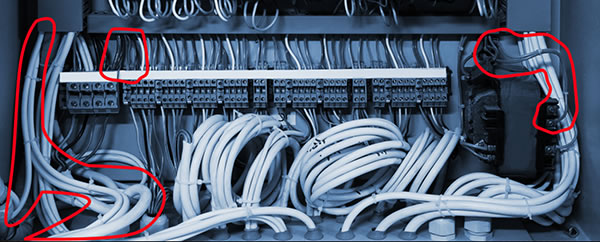
Scale the wires to a compatible size, then rotate and position them where you want them to be placed.
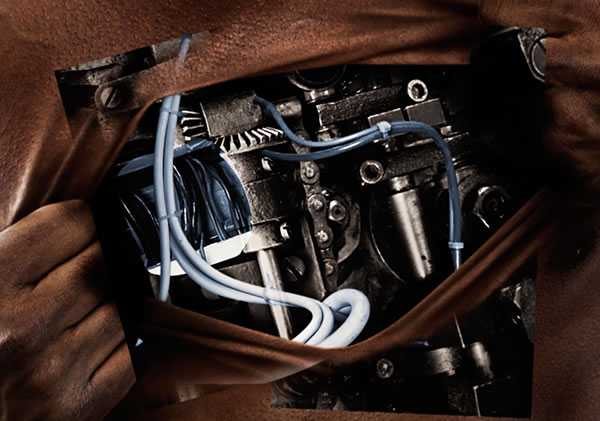
Desaturate with Hue/Saturarion set to -100 and mask to the wires look like some are passing behind some of the mechanical parts.
Using Curves, make shadows on the wires.


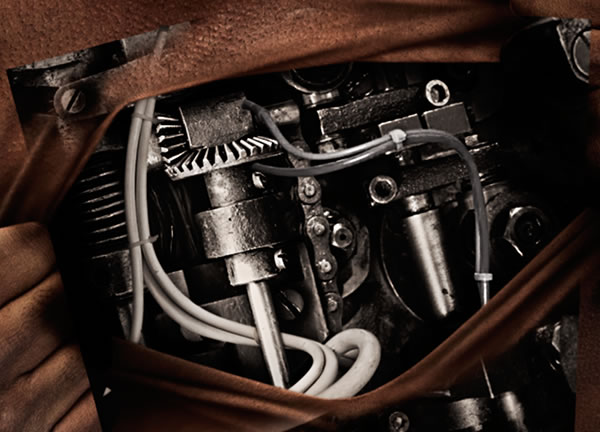
Group all the layers in a folder using Command/Ctrl-G, and on the folder, create a mask with path for the rip.

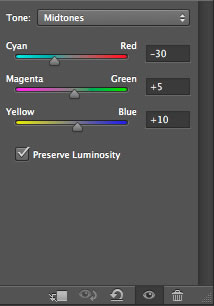
To finish this part, use Color Balance add a blue tone.

Create a Hue/Saturation layer and set Saturation to -25.

For contrast, create a new Black & White adjustment layer and set the Blend Mode toSoft Light and 30% opacity.
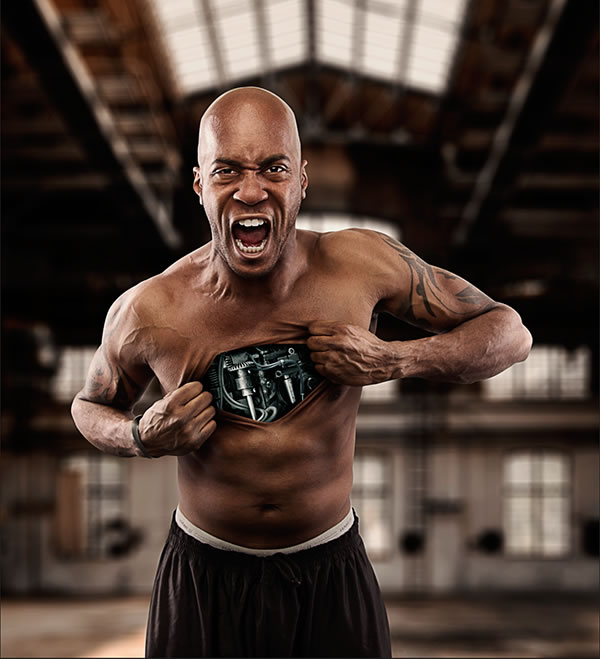
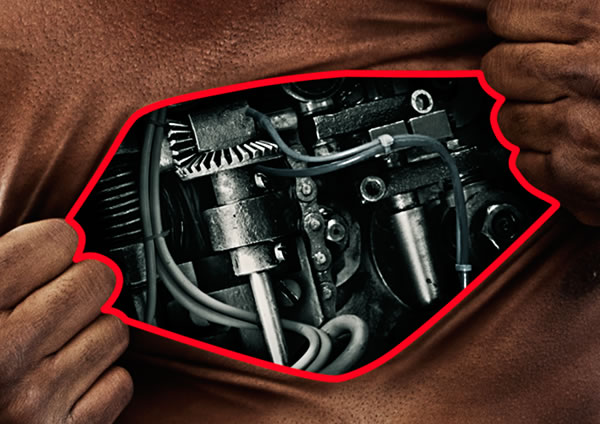
 Your image should look similar to the image above.
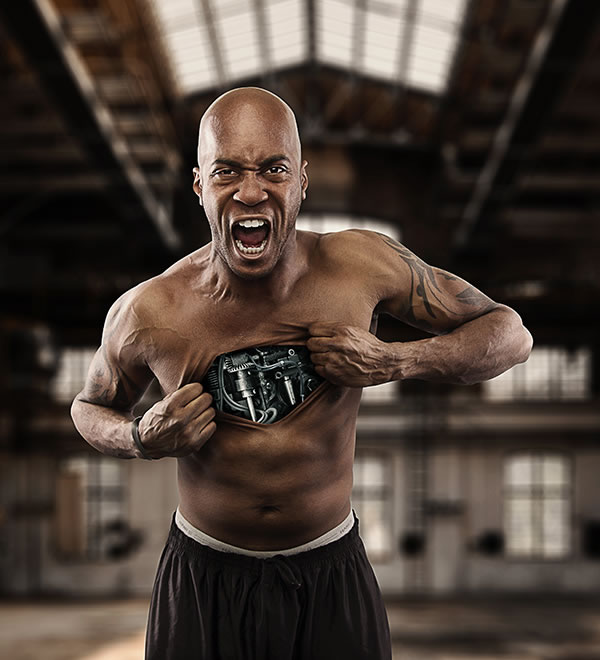
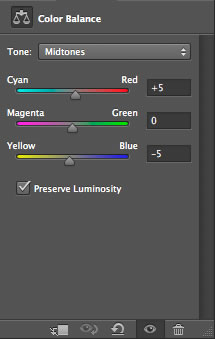
Use Color Balance to add warm tones. To conclude this tutorial, add two Color Lookups adjustments. First, use the Crisp Warm option with 30% opacity. With the second one, use Film Stock 50 and set the opacity to 20%.
In this tutorial, we showed you how to combine a series of photos that we shot in a tutorial in our Photography Category with some stock photos to create a photo manipulation inspired by Ars Thanea's Sao Paulo Football Club Series. In the process, we explained several techniques that can be applied to your projects including how to pull back the skin, how to extract a subject from its background, as well as how to combine stock photos to create mechanical objects. We hope that you learned something from this tutorial and can use the techniques used to create something exciting of your own.